Sunday, January 29, 2012

Windows

Purchased a tube of Testors Clear Parts Cement. Dries clear, but not completely flat like the original window. With curtains behind the "glass", you can't see it, but if you're looking for it on a bare window, you can. From a distance of more than a few inches, it's not a problem, and its much better than the glazing caused by super-glue.

It dries slower than white glue, surprisingly enough, but again while white glue dries white, this glue, while white-ish, dries clear.

See the difference between top and bottom?
After the Testors dries, I apply window treatments with the white glue, as it can be applied very thinly and doesn't soak through the paper. Plus, when it's spread very thinly, white glue dries just as fast as super-glue (which means you don't have a lot of time to correctly position a curtain in a window before it stays there).

Recycled School Material = New N Scale Windows
I ran-out of clear styrene the other day, but this morning, I found a more than suitable replacement. In fact, I think I like it better: cheap report covers. I have a few left-over from college, and one had been just sitting off to the side of my work-space, when I noticed the clear plastic cover. It's thinner than clear styrene, more easily glued, and more flexible, which came in handy when adding windows to the turret cupola on one of the buildings (I just made it into a tube and inserted it inside). Many times thinner than the styrene, it just about fades out of sight inside the building, meaning that I could easily wallpaper over the window without an appreciable bump if I so chose. Hmm.

Thursday, January 26, 2012

Breadboard

Had a breadboard and multimeter for the last couple years, my plan was to take some "recycled" electronics such as buzzers and LCD's, and repurpose them into toys for Nora when she was still a baby. I had a cordless phone, for instance, that had died and been replaced, that I was thinking about adding some switches, buzzers, and lights to, for Nora to play with, since she was so  fascinated by our cellphones.

It never actually happened, too much "other" stuff going on (school), but I still have the equipment, and thought that I'd pull it out and see what I could do with LCD's as far as my model building went.

Here's my first real breadboard/LCD circuit.


The multimeter was acting funny, so I took the battery out and noticed the connectors were loose. I super-glued them into place, hopefully that helps. It was doing this "thing" where it would show all zeros on the screen, but apparently didn't have enough juice to actually "do" anything.

Tuesday, January 17, 2012

Hotel Part 2

Taking another go at the hotel. I've decided to try a little interior lighting in this one, so I created some compartments upstairs, both so that I can model a room through a window, but also to minimize some of the light leakage into subsequent areas of the model.

I've also figured out how to scan the model and print it 1:1 so that I can add window dressing using the scanned image as a template for size and shape. I blacked-out the white areas, as you can see below, but I think I may go back and cut those out completely, leaving the window partially "open" so that during the day, all you see is the (painted black) interior, and at night when it's lit up, you see a tiny bit of light coming out from both the curtains and the window. We'll see what happens as I go to install them.


One thing I've noted about working with anything pulp based (balsa, cardboard, cardstock, anything paper) is that if you want a flat surface, once you start painting one side, you kind of have to paint the other, or it will warp horribly. Painting both sides warps both sides so that they come-out flat. Meh. 

Friday, January 13, 2012

Nikolas's Auto Shop

A revision of my Jim's Repair Shop kit for an eBay purchaser (thank you!) :


After taking the picture, I decided to see if I could pop the roof or floor off without causing any damage, he had indicated that he models a pre-STP era and it would have been a bit of an anacronysm. I was able to do so, and removed the sign, then reglued the roof and floor. 

After working many, many years in customer service, I'm going to try and take what I've learned and apply it to my eBay business by offering customization whenever possible, as well as my personal guarantees to my products. 

Thursday, January 12, 2012

DPM Under Woodland Scenics

Just received my first shipment of three new Design Preservation Model kits, and I must say that while the product is still the inexpensive, quality resin kit it always has been, the instructions have improved dramatically.

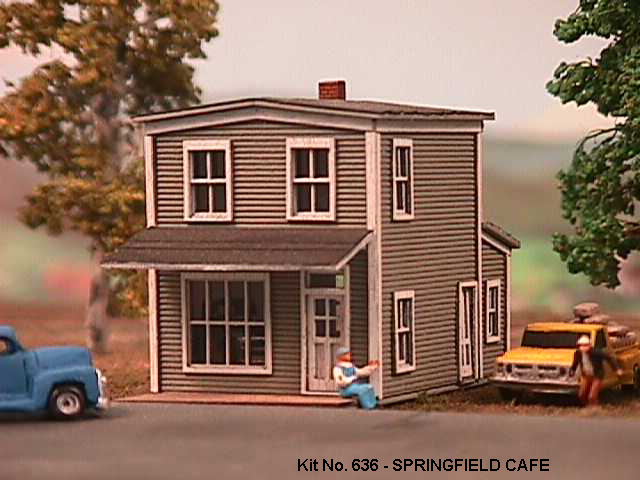
The Corner Turret Building for instance has a 3 page fold-out, with a color image on the cover of the completed building (versus a single page in previous kits, with black and white images only).

Furthermore, the molds have been updated to give each of the walls "alignment pins" so that the corners are more likely to match-up squarely. Sweet!

Addendum: the kits I first built must have been old as dirt, as the "newer" DPM kits also have the longer instructions, with the only difference between them and the Woodland Scenics being the color picture on the front, and replacing the paper instructions with a heavier cardstock. Even the "older" kit I received today had the tabs inside for the walls.

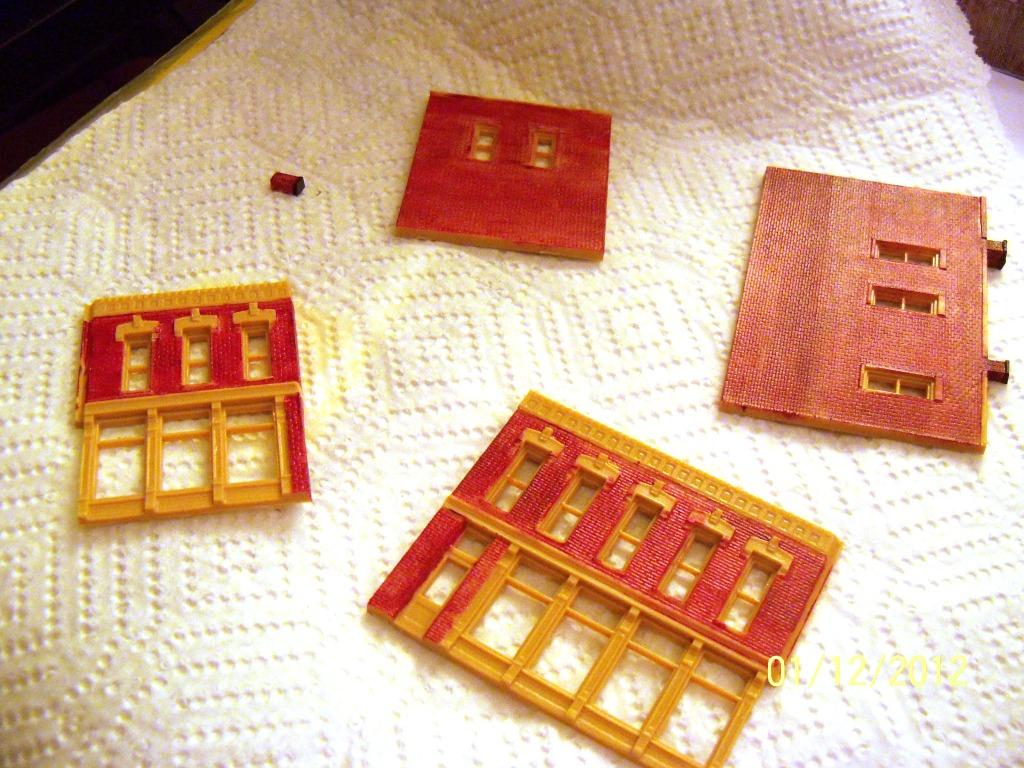
This morning I discovered that when I painted the brick onto the factory and "discovered" the new (to me) technique of painting mortar after the brickwork itself, it must have been at least a day or two (or a week, as I was working on it weekends), because acrylic, while dry to the touch, may take days to fully "cure". After about 14 hours, I went to apply white mortar to one seemingly dry wall of the newest building, and turned it pink. The white paint must have rehydrated the red mortar and mixed with it after I had gone to wipe off the white. Ugh. I did a small patch, so maybe instead of repainting (again), I'll put a sign there.

It's obvious that if I'm going to make these to sell, I need to create some sort of assembly line, where I can let kits sit and dry while working on others.

New and Old

The turret is comprised of five separate, tiny little pieces.


After the red had dried (not cured) , I went and painted the details. No mortar yet though.

Sunday, January 8, 2012

Workspace

This is the current work-space where I do my "art." This is upstairs in the extra bedroom ('the office') while the trains themselves are downstairs in the basement (because of the cat). I'm contemplating moving them upstairs though, since the layout really isn't that big; I'd just have to convince the cat to eat in another room.

Saturday, January 7, 2012

Springfield Cafe

This is the latest. My first wooden kit, and first "LaserKit" by American Model Builders Inc, it was quite a challenge. Each of the windows is three individual pieces, and I learned to ignore the directions in a couple critical areas.

After my first window, I learned that instead of assembling them as a unit and then installing the unit in the window opening, it worked out better for me personally to put the middle piece in the opening, and add the inside and outside pieces to that. Otherwise, even the slightest misalignment in any one of the three pieces could cause the whole assembly to not fit in the window.

The window on the far right side is the middle piece of this window assembly.
If I had the kit to do again, I also would have installed all the windows on their respective walls before assembling the walls, again a big difference from the instructions given. I'd also look for paint that works better on very thin pieces of balsa, as painting each of the window pieces with a standard artist acrylic (as I have done for every plastic based kit I've done) turned the once rigid wood into something that resembled rubber, and very hard to work with.

After taking a few pictures, I noted some areas that needed touching-up, in case you notice some paint differences from one picture to another. I'm of course going to use the after shots for eBay!


This is one of the things I fixed - note the gap in the right hand corner. I filled that with paint!

Same with this side.


Thursday, January 5, 2012

Video

Found this while perusing the N Scale Limited Facebook page, check it out:

Mike's Auto Parts

Newest addition: Mike's Auto Parts, from the "Jim's Repair Shop" kit made by Walthers Cornerstone Series.

This was made specifically to sell, as this past week I've been selling-off my collection of DPM models for a pretty good price. Kathleen's Bookstore has been rebranded and is up for sale, Eric's Hobby Shop is also up for sale, but the Robber Barons pub, 305 Main Street, and Taylor Pharmacy have already been shipped to their purchasers.

Hopefully, it won't be too long before our financial situation improves and I can replace these kits for my own use. Until then, I think I'll keep selling them, as I enjoy their construction, and actually make a tidy little profit!

I think what I will do with this kit is allow the purchaser to design a new sign that I will use to replace this one. It seems rather boring to me. Hmm. Especially considering the detail in the add-ons. It has a wall in the middle, floor to ceiling, with a picture of a real auto parts store on it. In addition, I gave it a "wood" floor, and added the signs inside and out. I also fixed the Quaker State sign on the side that fell-off shortly after this picture was taken (whoops). Not enough glue!


My next project: Springfield Cafe, a Laserkit by American Model Builders, Inc